0x01 wazuh集成thehive
集成thehive的步骤如下
在wazuh manager中安装thehive的python 依赖包
在 Wazuh manager上创建集成 Python 脚本。
在 Wazuh manager上创建 Bash 脚本。
将 TheHive 服务器集成到 Wazuh manager配置中。
重新启动wazuh manager。 可视化 TheHive 上的警报。
详细步骤
创建python文件
进入需要接入thehive的节点中为wazuh安装需要使用的thehive的python依赖包
sudo /var/ossec/framework/python/bin/pip3 install thehive4py在
/var/ossec/integrations/目录中创建一个custom-w2thive.py脚本。 参考integration - Local configuration (ossec.conf) · Wazuh documentation
custom-w2thive.py内容如下
#!/var/ossec/framework/python/bin/python3
import json
import sys
import os
import re
import logging
import uuid
from thehive4py.api import TheHiveApi
from thehive4py.models import Alert, AlertArtifact

# start user config
# Global vars
# threshold for wazuh rules level
lvl_threshold = 0
# threshold for suricata rules level
suricata_lvl_threshold = 3
debug_enabled = False

# info about created alert
info_enabled = True
# end user config
# Set paths
pwd = os.path.dirname(os.path.dirname(os.path.realpath(__file__)))

log_file = '{0}/logs/integrations.log'.format(pwd)

logger = logging.getLogger(__name__)

# set logging level
logger.setLevel(logging.WARNING)

if info_enabled:
    logger.setLevel(logging.INFO)

if debug_enabled:
    logger.setLevel(logging.DEBUG)
# create the logging file handler
fh = logging.FileHandler(log_file)
formatter = logging.Formatter('%(asctime)s - %(name)s - %(levelname)s - %(message)s')
fh.setFormatter(formatter)
logger.addHandler(fh)


def main(args):
    logger.debug('#start main')
    logger.debug('#get alert file location')
    alert_file_location = args[1]
    logger.debug('#get TheHive url')
    thive = args[3]
    logger.debug('#get TheHive api key')
    thive_api_key = args[2]
    thive_api = TheHiveApi(thive, thive_api_key)
    logger.debug('#open alert file')
    w_alert = json.load(open(alert_file_location))
    logger.debug('#alert data')
    logger.debug(str(w_alert))
    logger.debug('#gen json to dot-key-text')
    alt = pr(w_alert, '', [])
    logger.debug('#formatting description')
    format_alt = md_format(alt)
    logger.debug('#search artifacts')
    artifacts_dict = artifact_detect(format_alt)
    alert = generate_alert(format_alt, artifacts_dict, w_alert)
    logger.debug('#threshold filtering')
    if w_alert['rule']['groups'] == ['ids', 'suricata']:
        # checking the existence of the data.alert.severity field
        if 'data' in w_alert.keys():
            if 'alert' in w_alert['data']:
                # checking the level of the source event
                if int(w_alert['data']['alert']['severity']) <= suricata_lvl_threshold:
                    send_alert(alert, thive_api)
    elif int(w_alert['rule']['level']) >= lvl_threshold:
        # if the event is different from suricata AND suricata-event-type: alert check lvl_threshold
        send_alert(alert, thive_api)


def pr(data, prefix, alt):
    for key, value in data.items():
        if hasattr(value, 'keys'):
            pr(value, prefix + '.' + str(key), alt=alt)
        else:
            alt.append((prefix + '.' + str(key) + '|||' + str(value)))
    return alt


def md_format(alt, format_alt=''):
    md_title_dict = {}
    # sorted with first key
    for now in alt:
        now = now[1:]
        # fix first key last symbol
        dot = now.split('|||')[0].find('.')
        if dot == -1:
            md_title_dict[now.split('|||')[0]] = [now]
        else:
            if now[0:dot] in md_title_dict.keys():
                (md_title_dict[now[0:dot]]).append(now)
            else:
                md_title_dict[now[0:dot]] = [now]

    for now in md_title_dict.keys():
        format_alt += '### ' + now.capitalize() + '\n' + '| key | val |\n| ------ | ------ |\n'
        for let in md_title_dict[now]:
            key, val = let.split('|||')[0], let.split('|||')[1]
            format_alt += '| **' + key + '** | ' + val + ' |\n'
    return format_alt


def artifact_detect(format_alt):
    artifacts_dict = {}
    artifacts_dict['ip'] = re.findall(r'\d+\.\d+\.\d+\.\d+', format_alt)
    artifacts_dict['url'] = re.findall(
        r'http[s]?://(?:[a-zA-Z]|[0-9]|[$-_@.&+]|[!*\(\),]|(?:%[0-9a-fA-F][0-9a-fA-F]))+', format_alt)
    artifacts_dict['domain'] = []
    for now in artifacts_dict['url']: artifacts_dict['domain'].append(now.split('//')[1].split('/')[0])
    return artifacts_dict

def generate_alert(format_alt, artifacts_dict, w_alert):
    # generate alert sourceRef
    sourceRef = str(uuid.uuid4())[0:6]
    artifacts = []
    if 'agent' in w_alert.keys():
        if 'ip' not in w_alert['agent'].keys():
            w_alert['agent']['ip'] = 'no agent ip'
    else:
        w_alert['agent'] = {'id': 'no agent id', 'name': 'no agent name'}
    for key, value in artifacts_dict.items():
        for val in value:
            artifacts.append(AlertArtifact(dataType=key, data=val))
    alert = Alert(title=w_alert['rule']['description'],
                  tlp=2,
                  tags=['wazuh',
                        'rule=' + w_alert['rule']['id'],
                        'agent_name=' + w_alert['agent']['name'],
                        'agent_id=' + w_alert['agent']['id'],
                        'agent_ip=' + w_alert['agent']['ip'], ],
                  description=format_alt,
                  type='wazuh_alert',
                  source='wazuh',
                  sourceRef=sourceRef,
                  artifacts=artifacts, )
    return alert


def send_alert(alert, thive_api):
    response = thive_api.create_alert(alert)
    if response.status_code == 201:
        logger.info('Create TheHive alert: ' + str(response.json()['id']))
    else:
        logger.error('Error create TheHive alert: {}/{}'.format(response.status_code, response.text))

if __name__ == "__main__":

    try:
        logger.debug('debug mode')  # if debug enabled
        # Main function
        main(sys.argv)
    except Exception:
        logger.exception('EGOR')
python客户端编写细节参考TheHive-Project/TheHive4py: Python API Client for TheHive (github.com)
您在创建警报时已经知道可observables,则可以在alert创建方法中使用observables字段以获得更简洁的方法
my_alert = hive.alert.create(
    alert={
        "type": "my-alert",
        "source": "my-source",
        "sourceRef": "my-reference",
        "title": "My test alert",
        "description": "Just a description",
        "observables": [
            {"dataType": "ip", "data": "93.184.216.34"},
            {"dataType": "domain", "data": "example.com"},
        ],
    }
)
更改文件权限
sudo chmod 755 /var/ossec/integrations/custom-w2thive.py
sudo chown root:wazuh /var/ossec/integrations/custom-w2thive.py
创建bash执行文件
为了成功执行开发的.py脚本,我们必须构建一个名为custom-w2thive的bash脚本并将其放置在/var/ossec/integrations/custom-w2thive中。
文件内容如下
#!/bin/sh

# Copyright (C) 2015-2020, Wazuh Inc.
# Created by Wazuh, Inc. <info@wazuh.com>.
# This program is free software; you can redistribute it and/or modify it under the terms of GP>

WPYTHON_BIN="framework/python/bin/python3"
SCRIPT_PATH_NAME="$0"
DIR_NAME="$(cd $(dirname ${SCRIPT_PATH_NAME}); pwd -P)"
SCRIPT_NAME="$(basename ${SCRIPT_PATH_NAME})"
case ${DIR_NAME} in
    */active-response/bin | */wodles*)
        if [ -z "${WAZUH_PATH}" ]; then
            WAZUH_PATH="$(cd ${DIR_NAME}/../..; pwd)"
        fi
    PYTHON_SCRIPT="${DIR_NAME}/${SCRIPT_NAME}.py"
    ;;
    */bin)
    if [ -z "${WAZUH_PATH}" ]; then
        WAZUH_PATH="$(cd ${DIR_NAME}/..; pwd)"
    fi
    PYTHON_SCRIPT="${WAZUH_PATH}/framework/scripts/${SCRIPT_NAME}.py"
    ;;
     */integrations)
        if [ -z "${WAZUH_PATH}" ]; then
            WAZUH_PATH="$(cd ${DIR_NAME}/..; pwd)"
        fi
    PYTHON_SCRIPT="${DIR_NAME}/${SCRIPT_NAME}.py"
    ;;
esac

${WAZUH_PATH}/${WPYTHON_BIN} ${PYTHON_SCRIPT} $@
*/active-response/bin | */wodles*): 这是一个模式,如果匹配,则将 WAZUH_PATH 和 PYTHON_SCRIPT 设置为 ${DIR_NAME}/${SCRIPT_NAME}.py。
(*/bin):这是另一种模式,如果匹配,则将 WAZUH_PATH 和 PYTHON_SCRIPT 设置为${WAZUH_PATH}/framework/scripts/${SCRIPT_NAME}.py。
(*/integrations): 这是第三个模式,如果匹配,则将 WAZUH_PATH 和 PYTHON_SCRIPT 设置为 ${DIR_NAME}/${SCRIPT_NAME}.py。(${WAZUH_PATH}/${WPYTHON_BIN}) 和任何命令行参数都会传递到 Bash 脚本 ($@)。
修改文件权限
sudo chmod 755 /var/ossec/integrations/custom-w2thive
sudo chown root:wazuh /var/ossec/integrations/custom-w2thive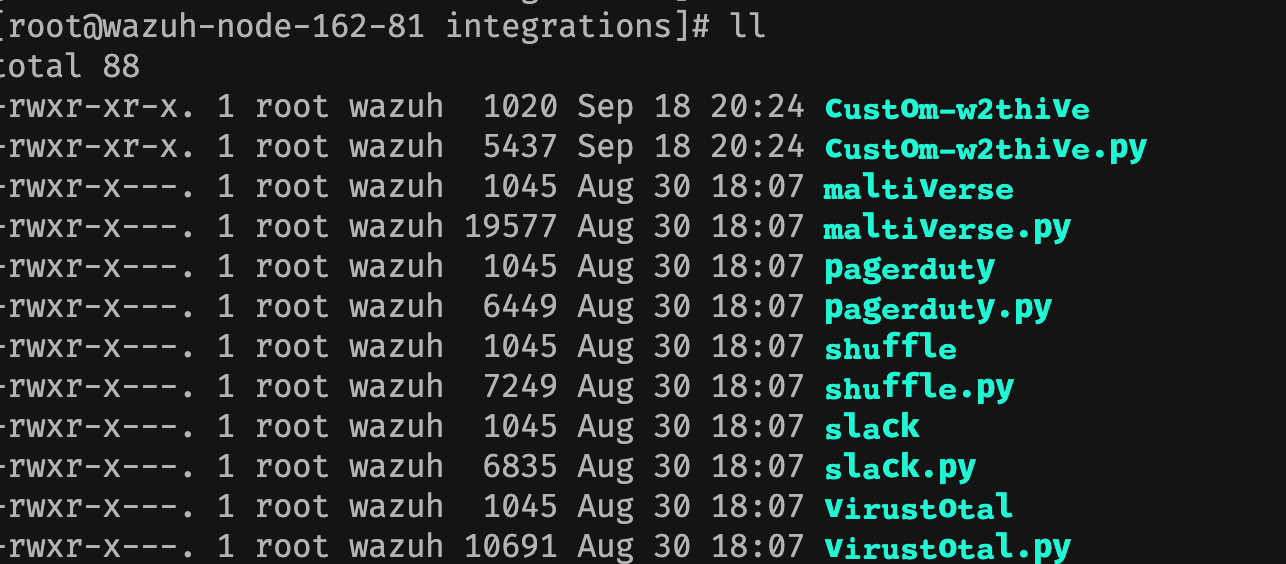
修改wazuh manager配置文件
修改/var/ossec/etc/ossec.conf 文件。 需要那台机器上的告警就在那台机器上修改。
<ossec_config>
…
  <integration>
    <name>custom-w2thive</name>
    <hook_url>http://TheHive_Server_IP:9000</hook_url>
    <api_key>RWw/Ii0yE6l+Nnd3nv3o3Uz+5UuHQYTM</api_key>
    <alert_format>json</alert_format>
  </integration>
…
</ossec_config>
这里的apikey是在thehive创建的api User的api Key

重启服务
sudo systemctl restart wazuh-managerthehive 获取到数据

0x02 thehive集成misp
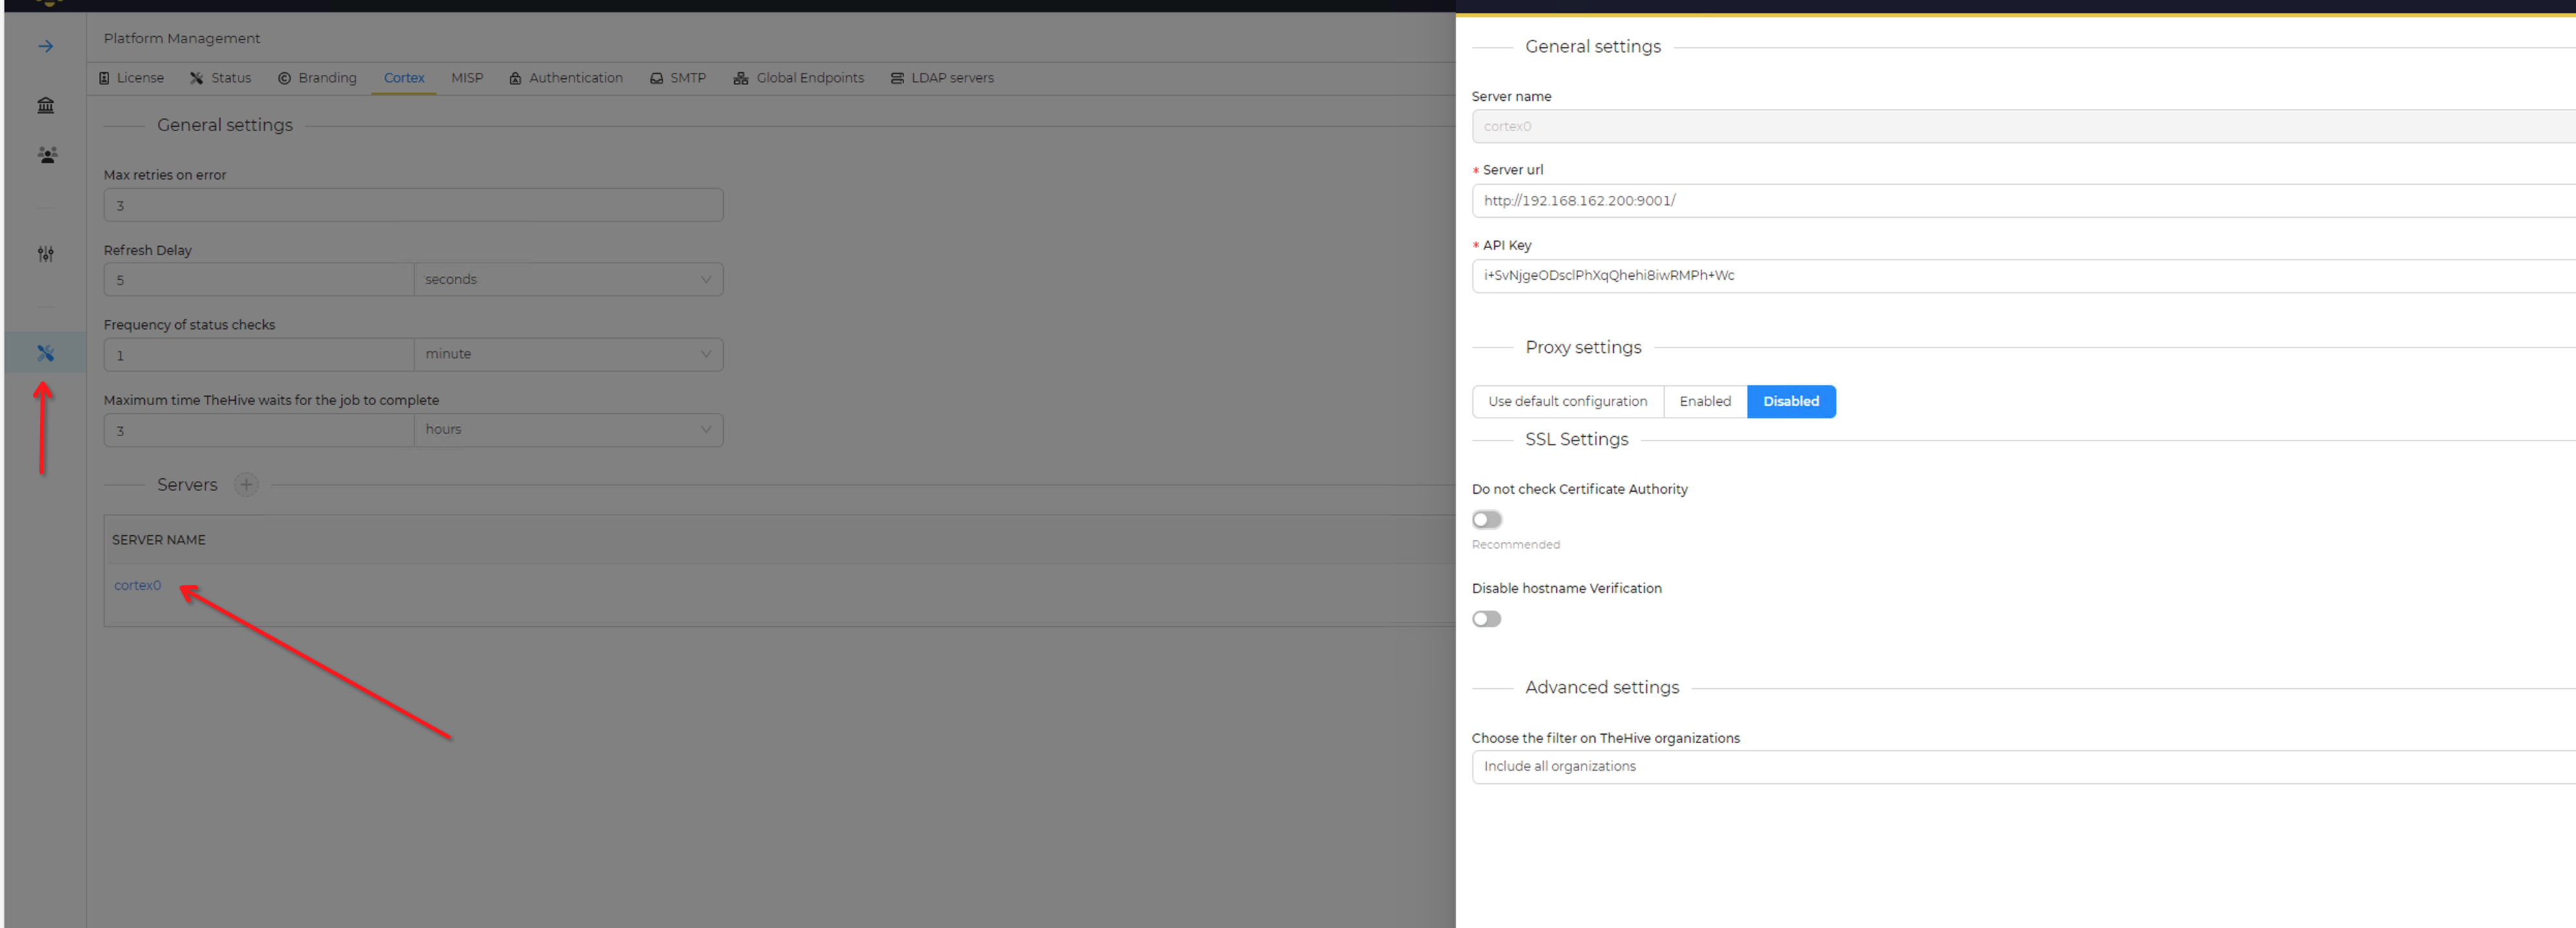
1、thehive 集成cortex
进入thehive的管理员账号
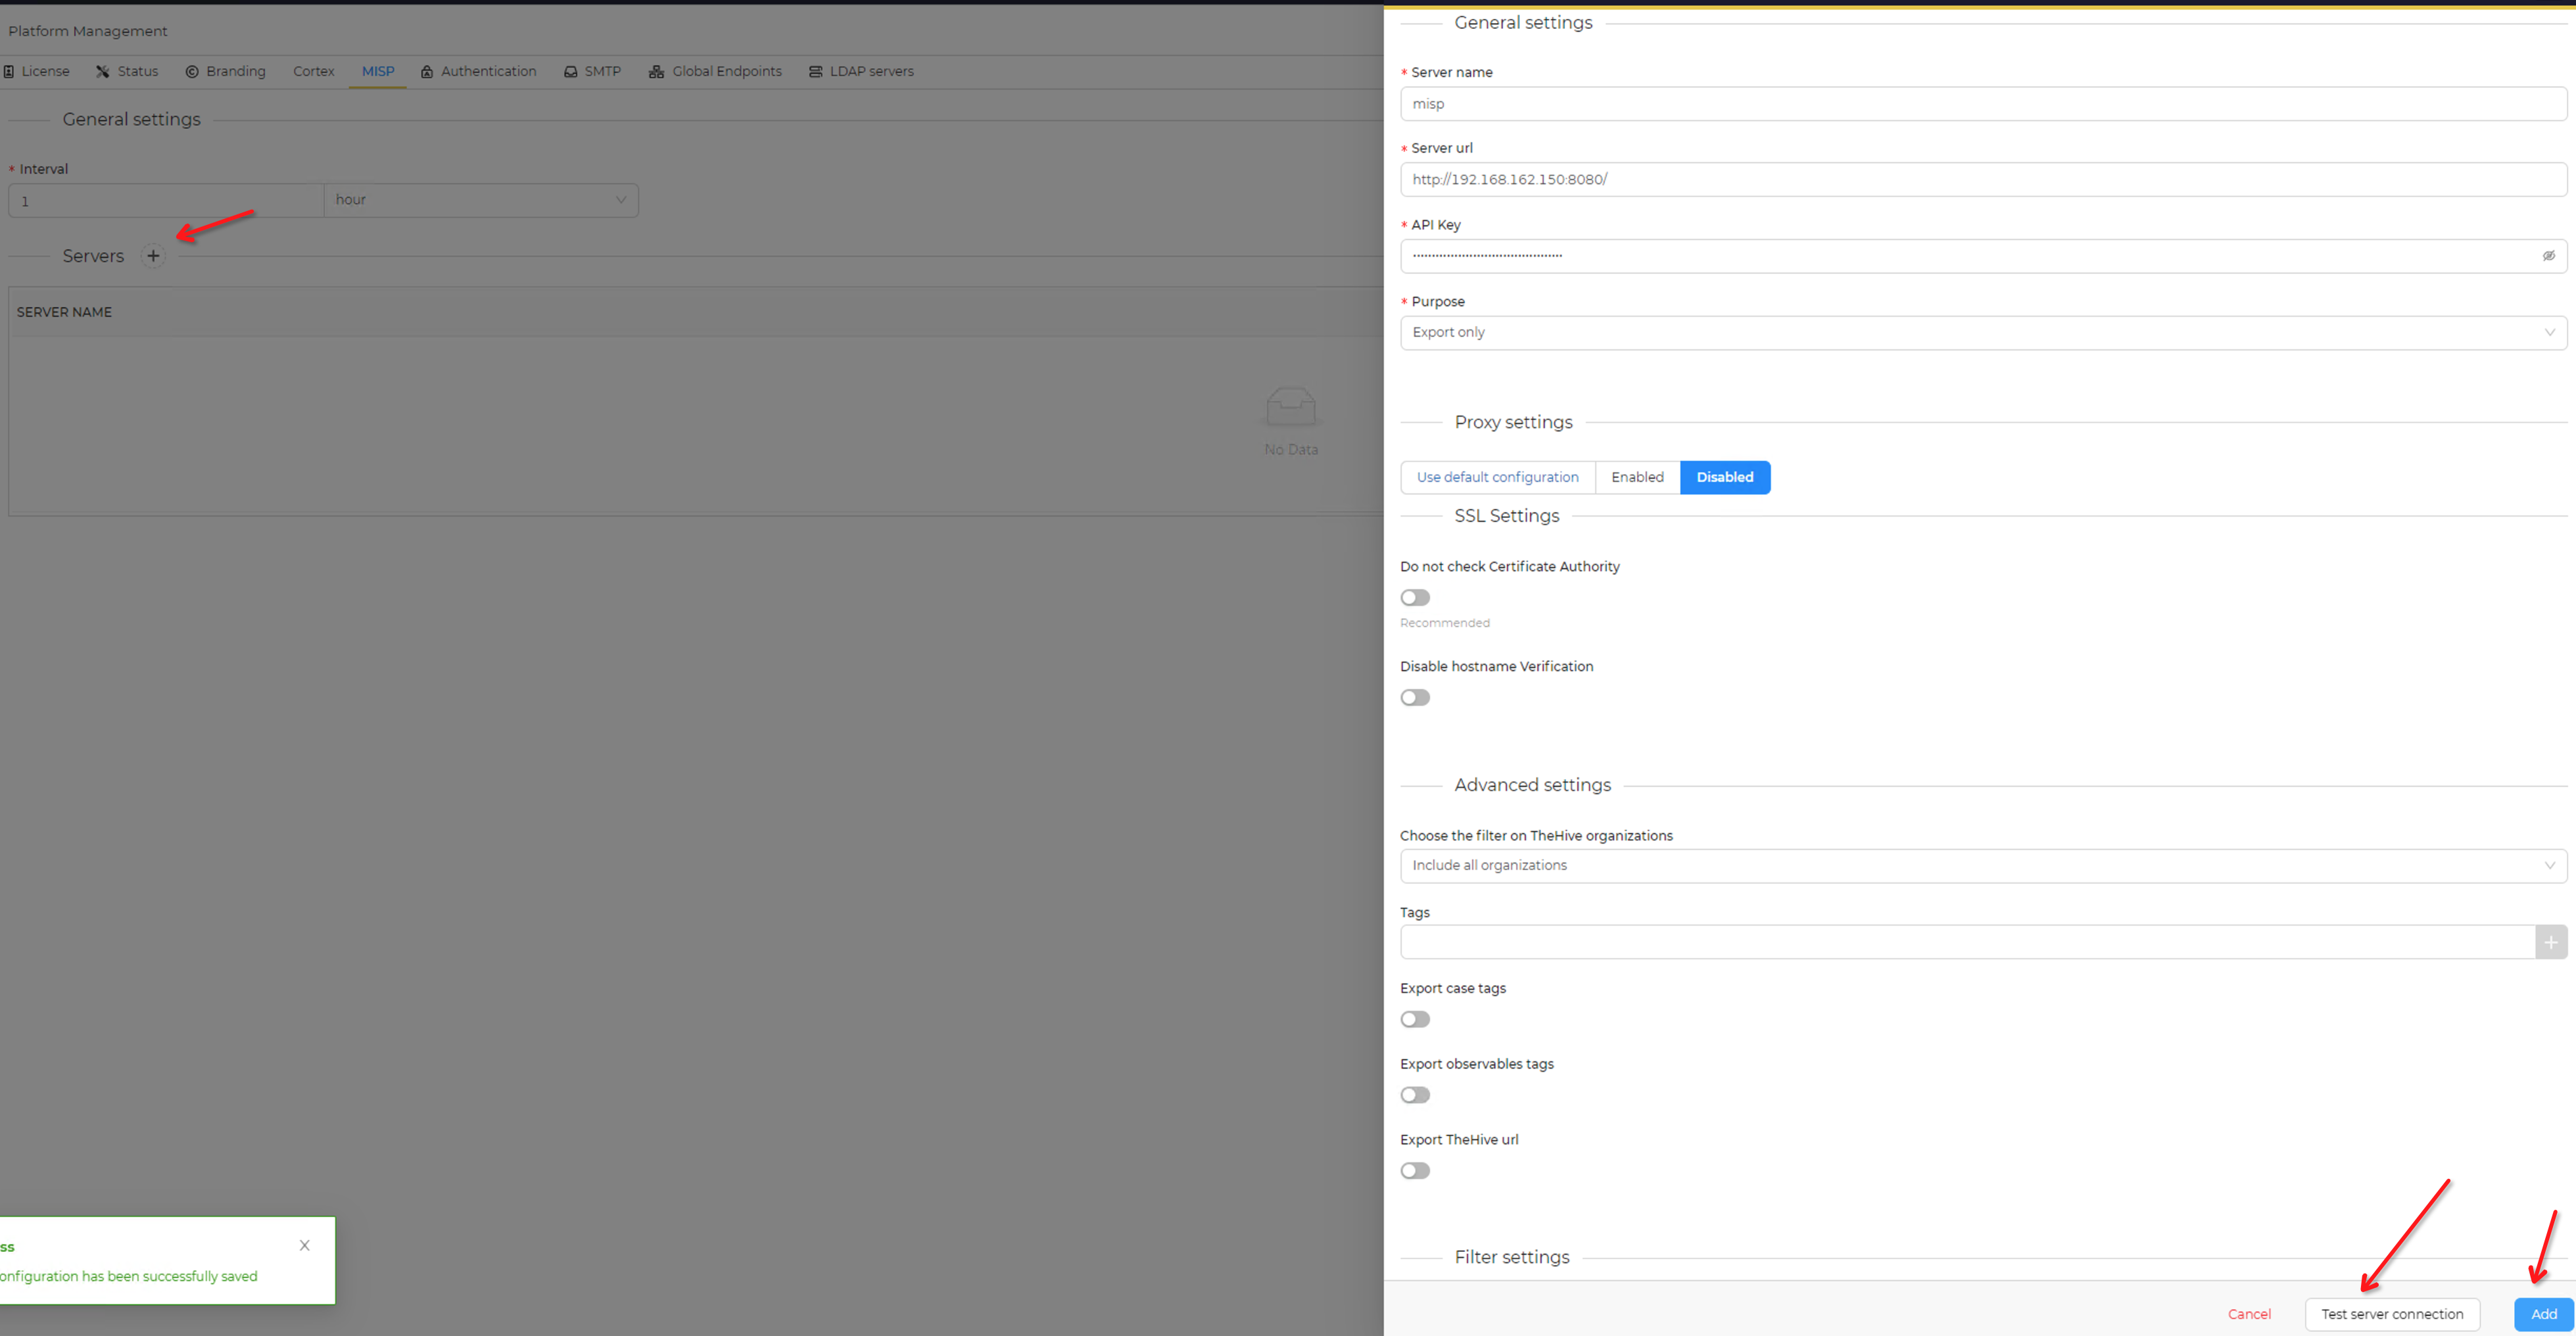
进入平台管理菜单
配置cortex,apikey需要去cortex系统获取,在上一篇中相关用户已经创建了
2、cortex集成misp
使用api的账号登录到cortex系统中进行设置

点击enble接入misp,注意这里需要填入在上一篇中我们在misp中创建的账号的key
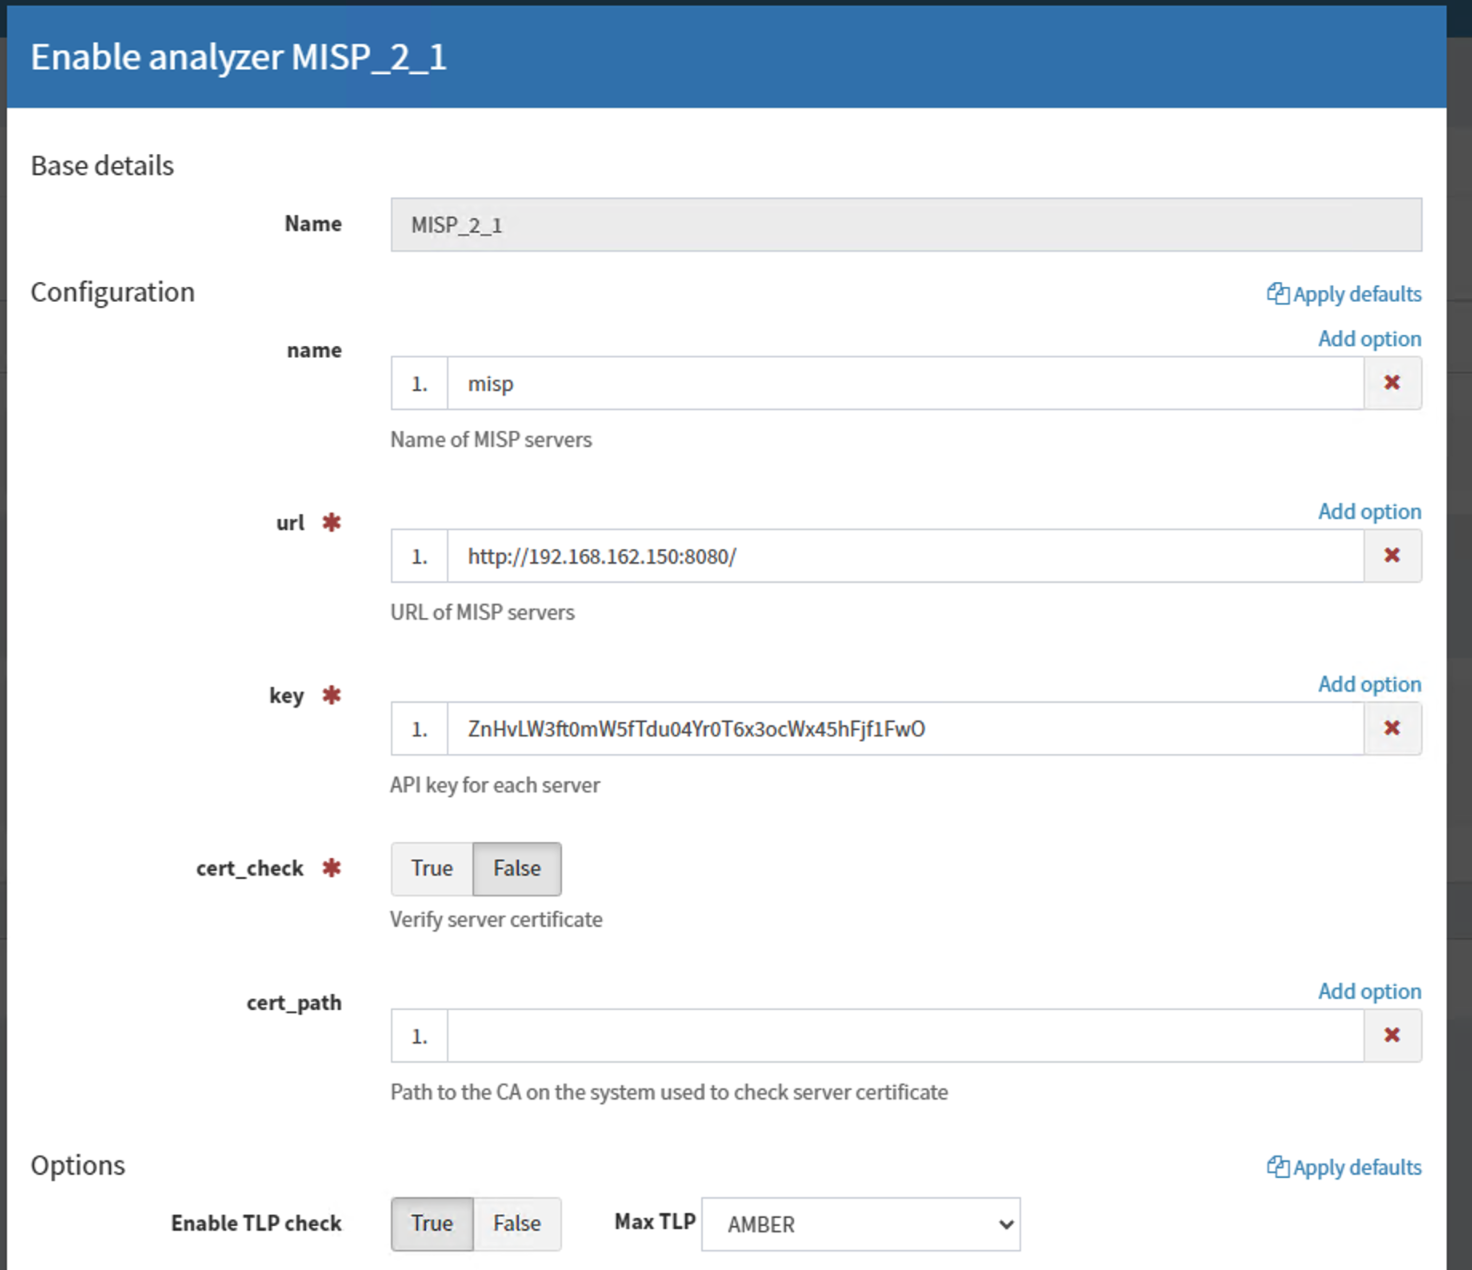

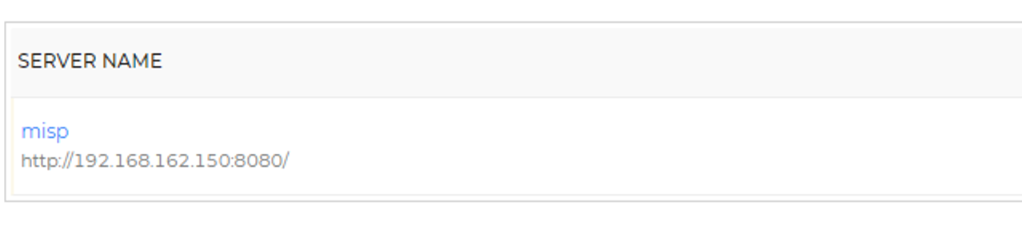
配置成功
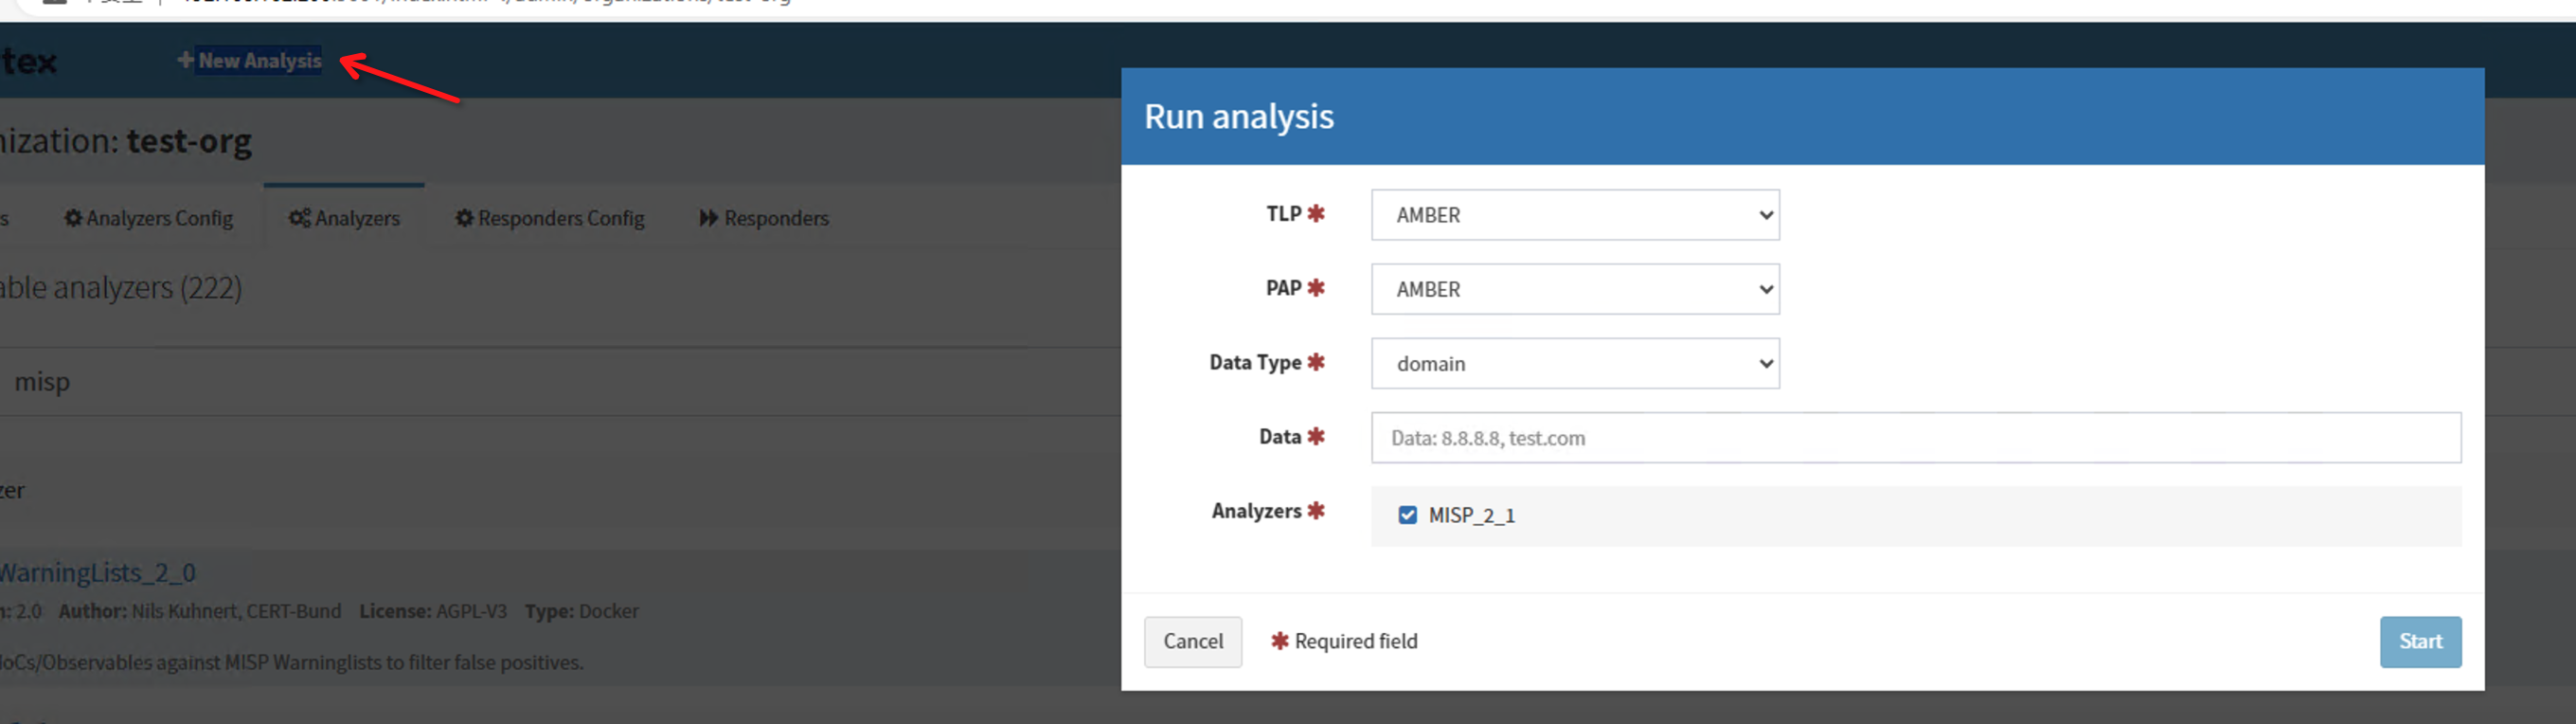
现在,是时候验证有效性了。在左上角,您有一个“ New Analysis”按钮。现在,将 TLP 设置为 AMBER,将 PAP 设置为 AMBER,将数据类型设置为domain。这样我能得到一个 MISP_2_1选项,如图所示:
3 thehive集成misp
使用管理员账号进入thehive管理界面
添加成功
4 使用案例
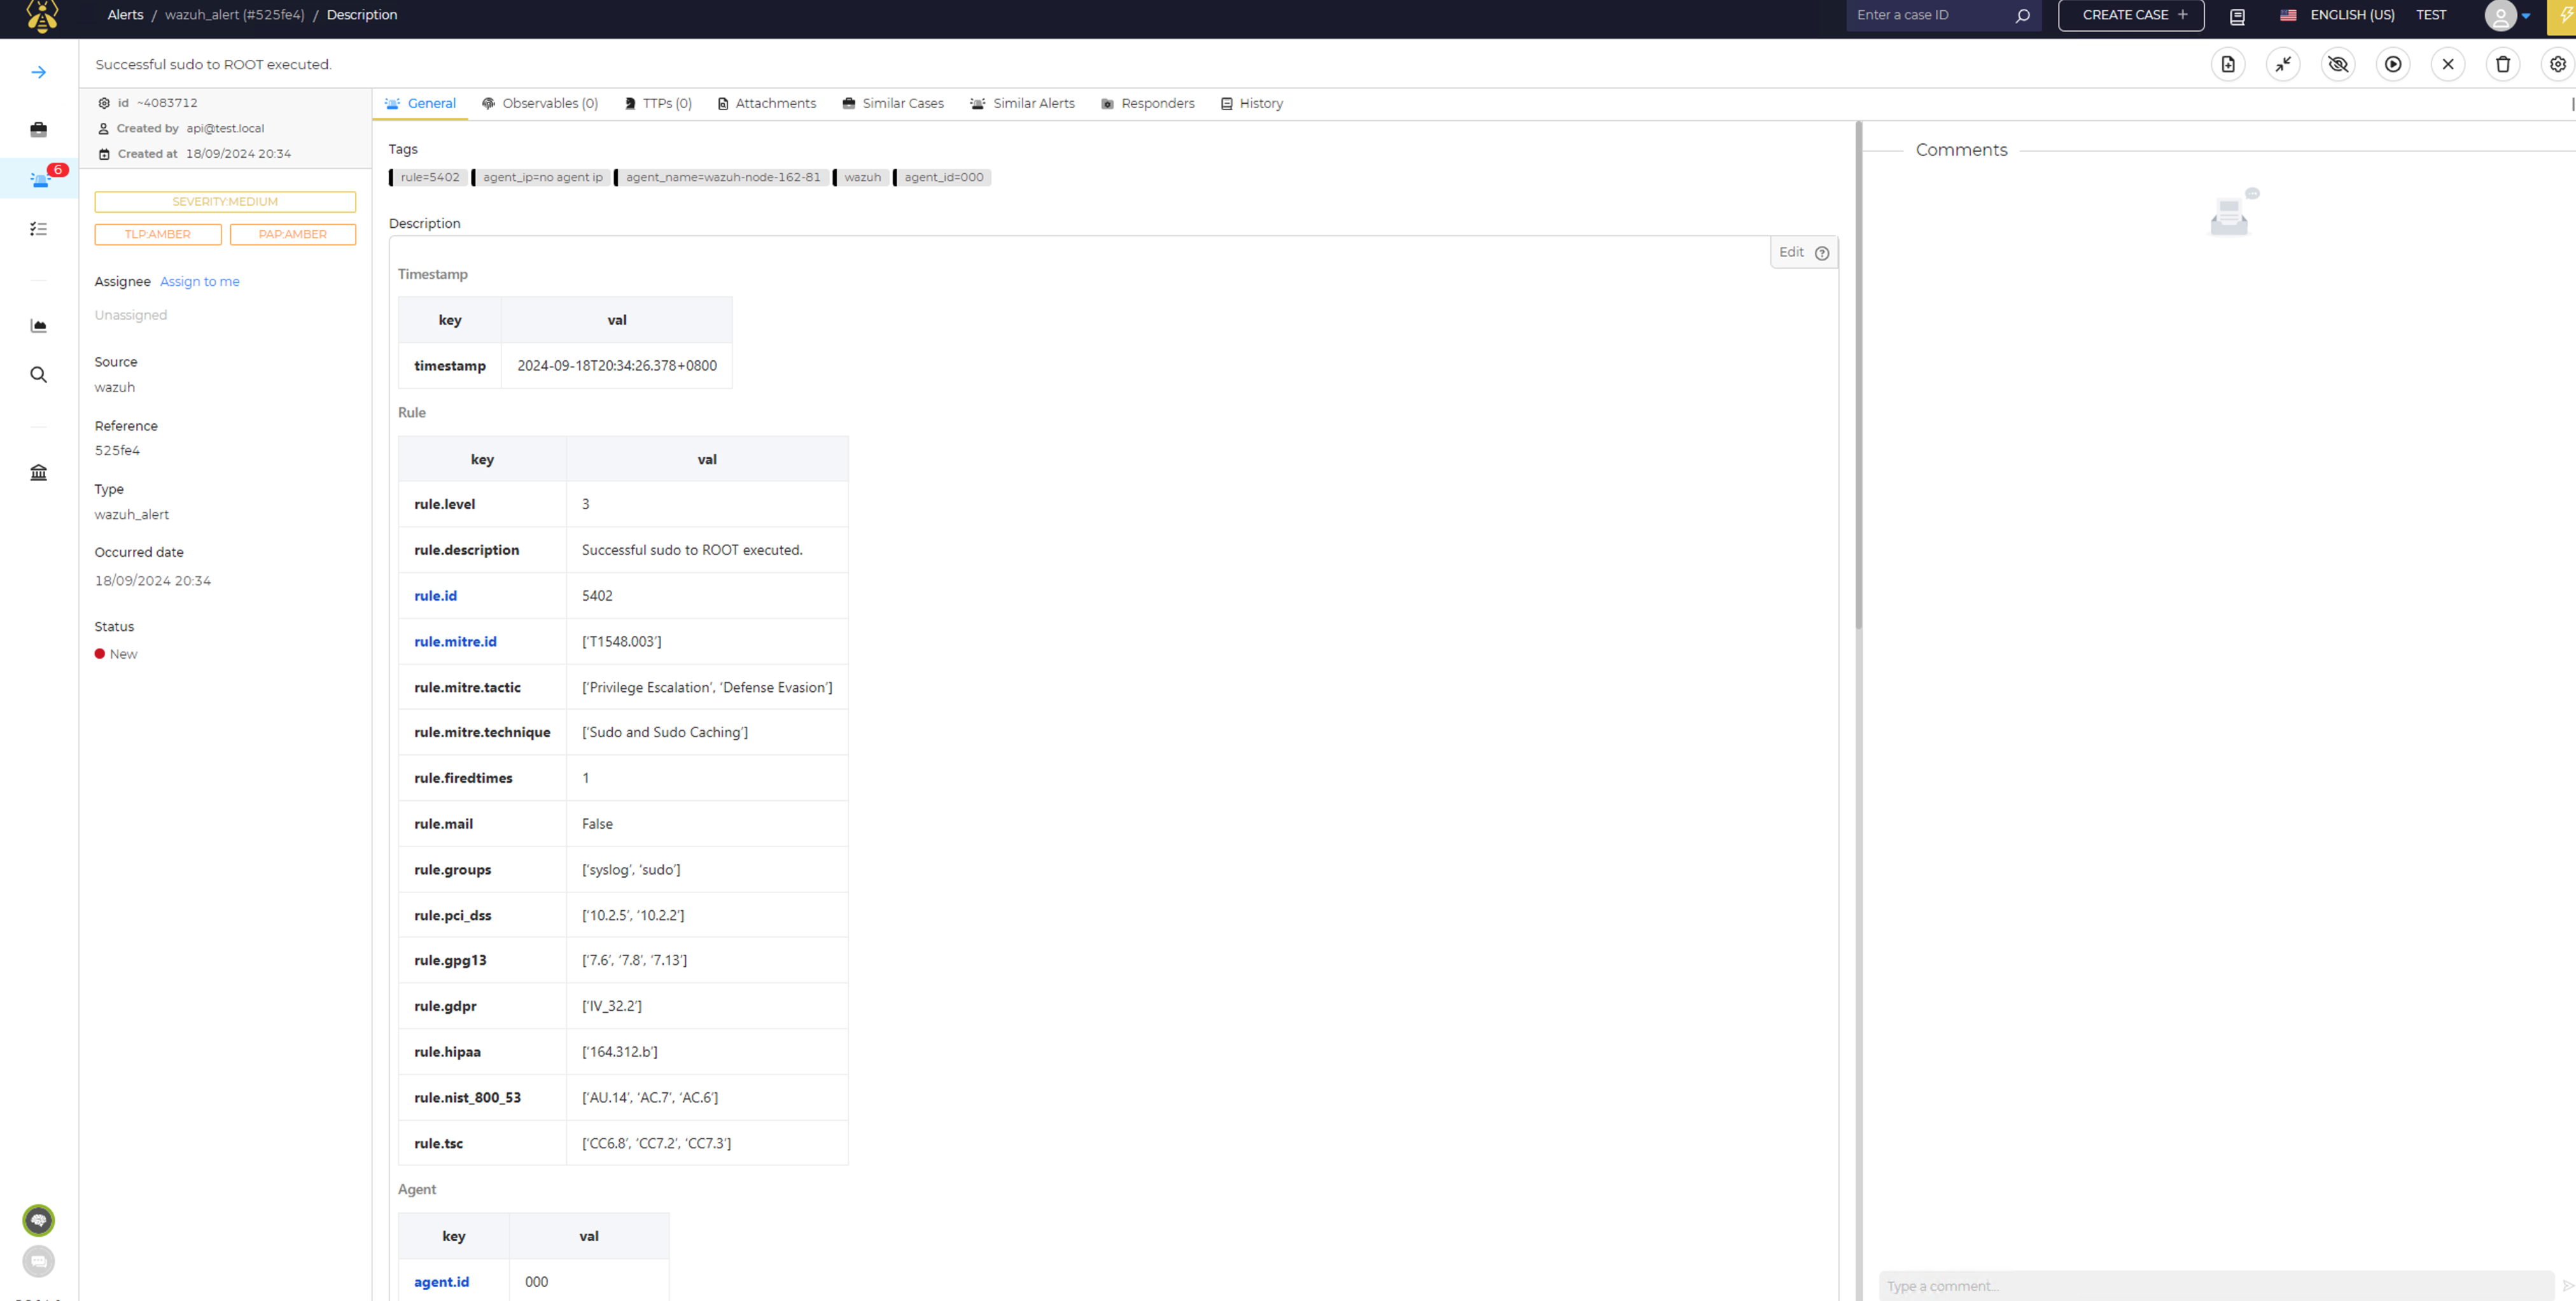
General: This is a tab that has Tags, Description, Wazuh Rule, and Wazuh Agent information
Observable: 显示 IP 地址、域、URL、哈希值等信息
TTPs: 这里显示att&ck相关数据
Similar Cases: 展示与之相近的case
Similar Alerts: 展示与之相近的alert
Responder: 显示响应结果
History: 这显示了alert的历史记录
Create case from alert: 您可以使用此alert创建一个全新的case。建议您仅在确定这不是误报时才执行此操作。
Merge selection into case: 您可以将警报合并到单个case中
Ignore new update: 一旦选择,您将不会收到有关此警报的任何更新。
Start: 单击此start按钮后,您无需创建案例即可继续start。您可以将alert的状态更改为“待处理”,添加一些摘要注释,然后将其分配给其他安全运营人员
点击start按钮且设置状态后,可以对告警进行后续处理,包括设置为误报、已处理等

Close: 如果您确定这是误报或重复,您可以关闭警报。
0x03 创建case
确信需要处理某个警报,您可以创建新case或使用case模板。单击empty case后,您需要输入case标题、严重性、任务等详细信息。您可以创建多个任务并将它们分配给不同的团队成员,如屏幕截图所示:
1 手动创建case
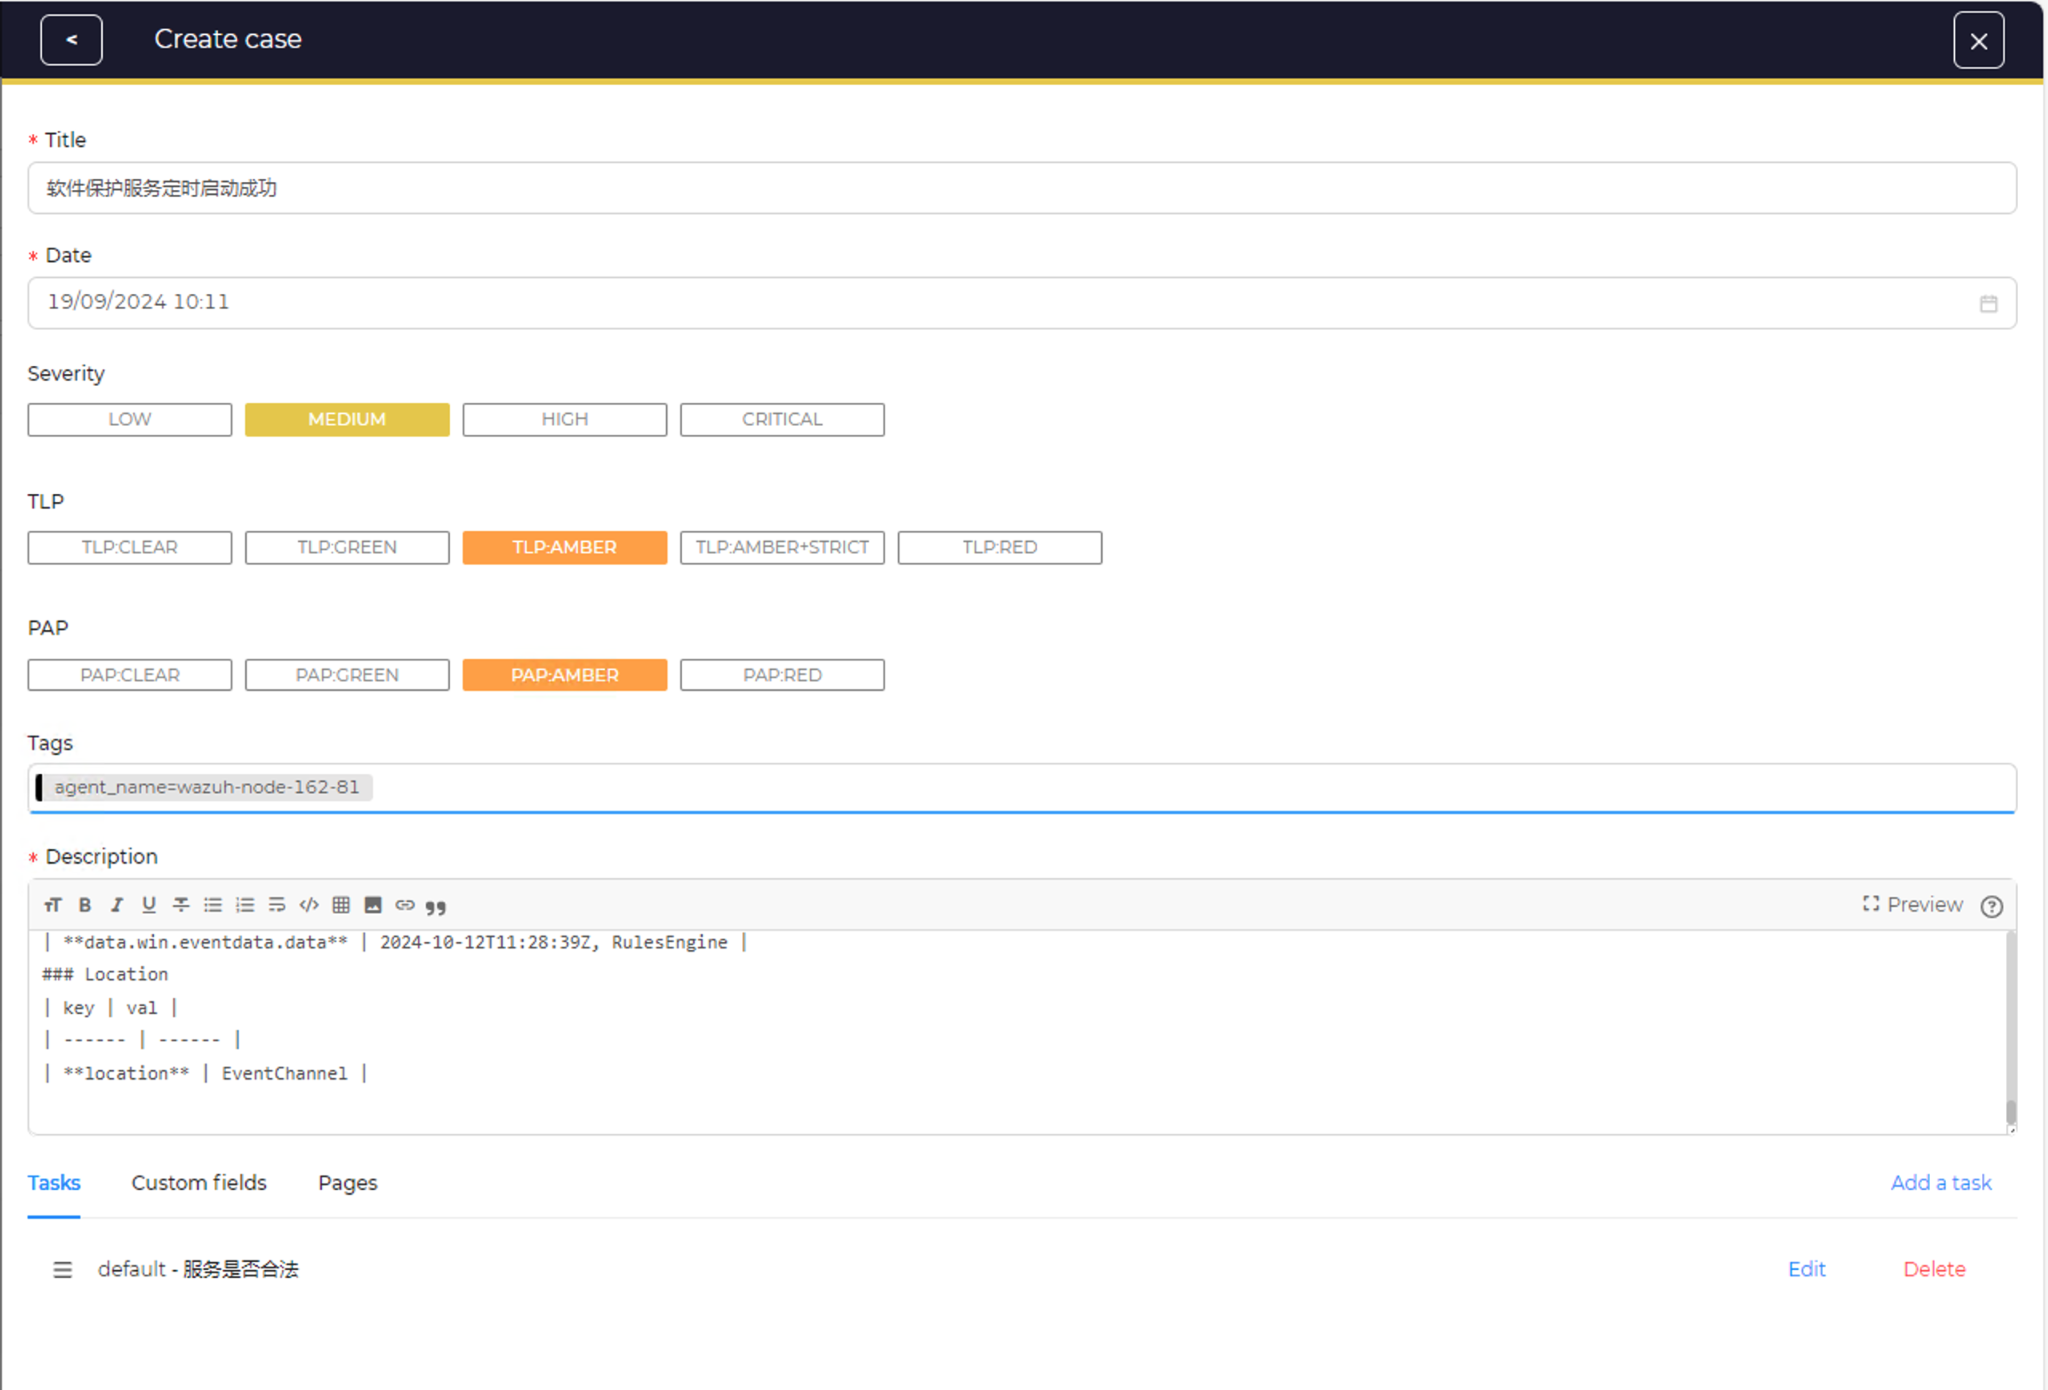
Add a task: 可以向团队其他人员分配不同的任务
2 从alert中创建case

手动增加一个observable

点击observable左侧的菜单,然后选择运行分析器,如下图所示:

Run analyzers: 这代表执行 Cortex 分析器的操作。在本例中,我们希望获取 Svshost.exe 并针对 MISP 服务器运行分析器以进行威胁情报查找。一旦我们选择Run analyzers,您应该看到 MISP_2_1。选择它并单击“Run Selected Analyze”,如以下屏幕截图所示:

等待20 秒左右,应该就能从 MISP 服务器获得威胁情报报告


EventID: 这表示来自 MISP 服务器的事件 ID。在本例中,事件 ID 为 1125。通过这个事件ID可以去misp服务中搜索详细信息
From:这代表威胁情报源提供商。在本例中,它是 CIRCL。
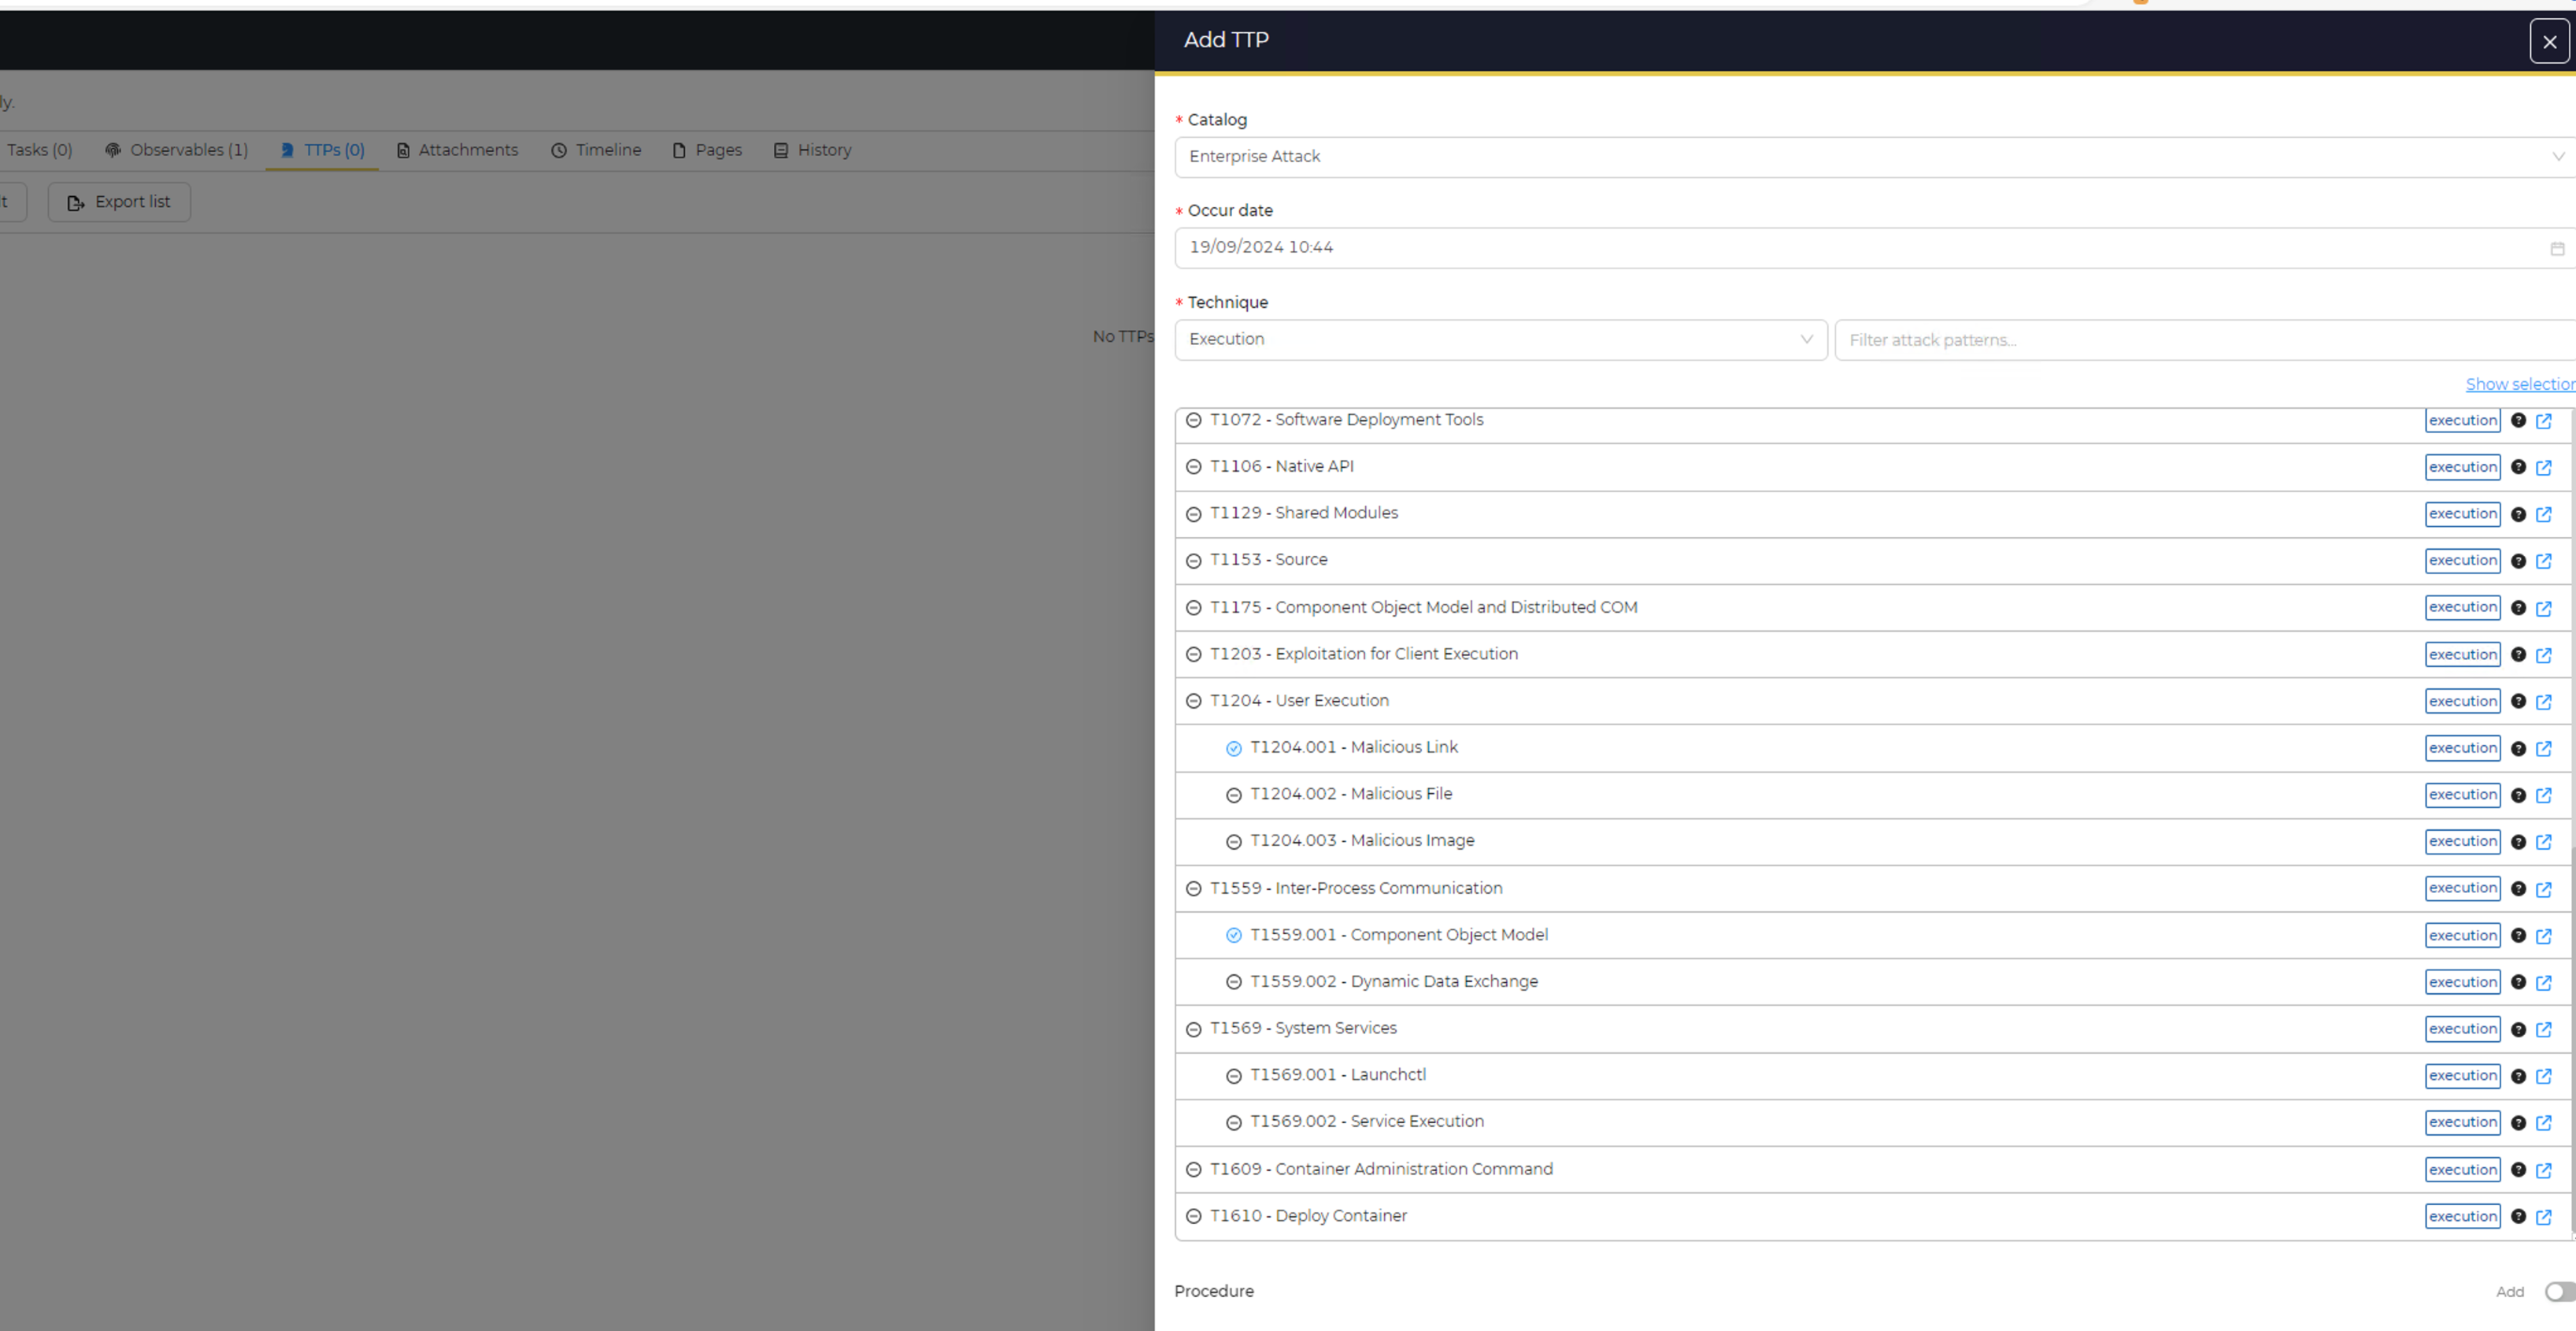
3 TTPs
TTP 分析可以通过揭示攻击者如何进行攻击来帮助安全团队检测和减轻攻击。 TTP 是攻击者使用的策略、技术和程序。 MITRE ATT&CK 框架使 SOC 团队能够识别并解决他们遇到的 TTP。TheHive 从 Wazuh 事件导入 TTP,并增强我们的安全调查。
我们可以以下步骤手动为case增加TTPs
找到指定的case
点击顶部的TTPs按钮
点击增加
键入相关数据